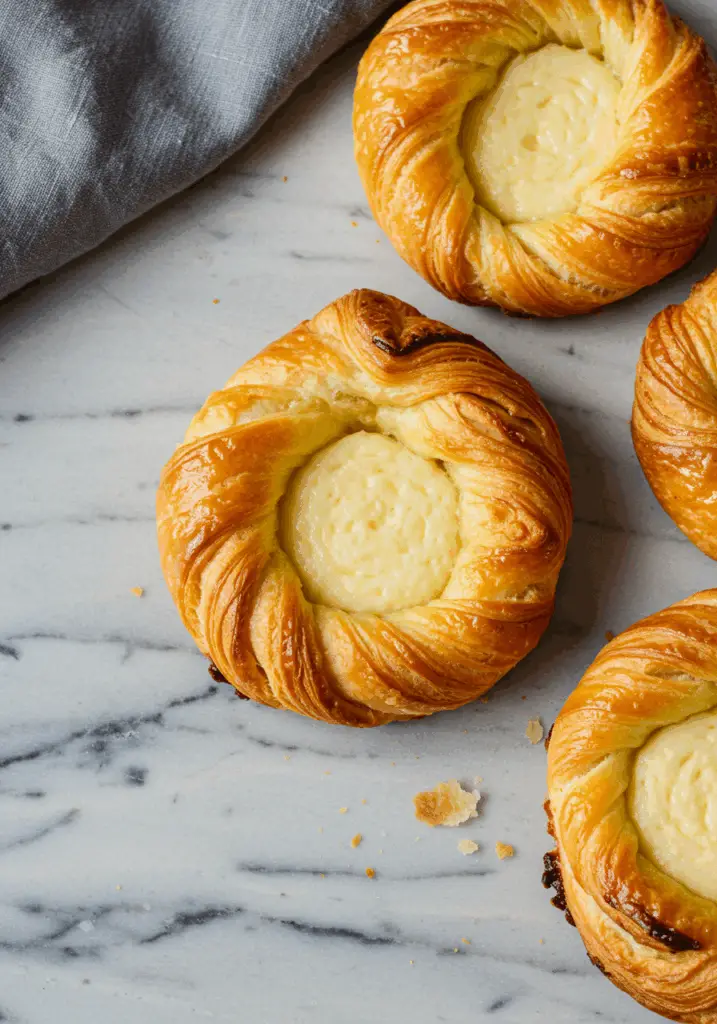
If you love buttery, flaky pastries with a creamy, tangy-sweet filling, these Homemade Cheese Danishes are going to be your new favorite treat. They’re perfect for breakfast, brunch, or a cozy afternoon snack. With a golden puff pastry base and a luscious cream cheese center, these danishes are both elegant and easy to make at home.
Want recipes like this delivered straight to your inbox? Subscribe now to get the latest culinary creations you’ll love.
Why You’ll Love This Recipe
Simple Yet Elegant – Looks like a bakery treat, but made with just a few ingredients.
Make-Ahead Friendly – Assemble in advance and bake fresh in the morning.
Creamy & Flaky Combo – Crispy pastry paired with rich cream cheese is irresistible.
Customizable – Add fruit toppings or drizzle with glaze to switch things up.
Crowd-Pleaser – Great for entertaining, brunch parties, or holiday mornings.
Ingredients You’ll Need
For the Cheese Filling:
- 8 oz cream cheese, softened
- ¼ cup granulated sugar
- 1 tsp vanilla extract
- 1 tbsp lemon juice
- 1 tsp lemon zest
- 1 egg yolk (save the white for brushing the pastry)
For the Pastry:
- 1 sheet puff pastry, thawed
- 1 egg white (for egg wash)
- 1 tbsp water (to mix with egg white)
Optional Toppings:
- Fresh berries (blueberries, raspberries, sliced strawberries)
- Fruit preserves or jam
- Powdered sugar, for dusting
- Vanilla glaze (see notes below)
Tools You’ll Need
- Mixing bowls
- Hand mixer or whisk
- Zester or fine grater
- Sharp knife or pizza cutter
- Baking sheet lined with parchment paper
- Pastry brush
- Cooling rack
Step-by-Step Instructions
Step 1: Prepare the Cheese Filling
- In a medium bowl, combine softened cream cheese, sugar, vanilla extract, lemon juice, lemon zest, and egg yolk.
- Beat with a hand mixer or whisk until smooth and creamy. Set aside.
Step 2: Preheat the Oven
3. Preheat your oven to 400°F (200°C). Line a baking sheet with parchment paper.
Step 3: Cut the Puff Pastry
4. Unroll or unfold the puff pastry sheet on a lightly floured surface.
5. Cut it into 6 equal rectangles using a sharp knife or pizza cutter.
6. Score a smaller rectangle about ½ inch inside each piece (don’t cut all the way through). This helps the edges puff up while keeping the filling centered.
Step 4: Add the Filling
7. Spoon about 1 to 1½ tablespoons of the cream cheese filling into the center of each rectangle.
8. Use the back of a spoon to gently spread the filling, staying inside the scored lines.
Step 5: Egg Wash & Bake
9. Whisk the egg white with 1 tablespoon of water to make an egg wash.
10. Brush the outer edges of each pastry with the egg wash for a golden finish.
11. Bake in the preheated oven for 15-18 minutes, or until the danishes are puffed and golden brown.
Step 6: Cool & Add Toppings
12. Remove from oven and let cool on the baking sheet for 5 minutes, then transfer to a cooling rack.
13. Top with fresh berries or a small spoonful of fruit preserves if desired.
14. Dust with powdered sugar or drizzle with glaze once fully cooled.
Tips for Perfect Cheese Danishes
Use Cold Pastry – Keep your puff pastry chilled until you’re ready to use it to ensure it puffs up beautifully.
Don’t Overfill – Too much filling can overflow and make the pastry soggy.
Chill Before Baking – If your kitchen is warm, pop the assembled danishes in the fridge for 10 minutes before baking for extra flakiness.
Line the Baking Sheet – Always use parchment to prevent sticking and make cleanup easy.
Cool Before Glazing – Let them cool completely before adding glaze so it doesn’t melt off.
Serving Suggestions
Serve these danishes with a cup of coffee or tea for the ultimate café-style breakfast at home. Add a fresh fruit platter and yogurt on the side for a complete brunch spread.
Make-Ahead & Storage Tips
Make-Ahead:
You can prepare the filling and cut the pastry the night before. Assemble just before baking for the freshest result.
Storing:
Store leftover danishes in an airtight container at room temperature for 1 day, or in the refrigerator for up to 3 days.
Reheating:
Reheat in the oven at 300°F (150°C) for 5-7 minutes to refresh the crispness. Avoid microwaving, which can make the pastry soggy.
Frequently Asked Questions
- Can I use homemade pastry?
Yes! If you prefer to make your own puff pastry or use crescent roll dough, go for it. - What fruits work best on top?
Blueberries, raspberries, and sliced strawberries are delicious. You can also use a small spoonful of jam or preserves. - Can I make it gluten-free?
Use a gluten-free puff pastry sheet and double-check your other ingredients. - What if I don’t have lemon zest?
You can skip it or add a touch more vanilla or a drop of almond extract for flavor. - Can I freeze them?
Yes. Freeze unbaked assembled danishes, then bake straight from frozen, adding 3–4 extra minutes to the baking time.
Final Thoughts
Homemade Cheese Danishes are the kind of treat that makes an ordinary morning feel extra special. Whether you’re enjoying one warm from the oven or adding them to your brunch table, their flaky layers and creamy center are always a hit. Easy to make and even easier to love, these danishes prove you don’t need to visit a bakery to enjoy something truly delicious.
Try this recipe and let me know how it turns out for you! Don’t forget to tag your creations on social media—I love seeing what you bake.
Preparation Time: 15 minutes
Cooking Time: 18 minutes
Cuisine: American
Nutritional Information (Per Serving):
Calories: 290 | Protein: 5g | Carbohydrates: 24g | Fat: 19g | Fiber: 1g | Sodium: 210mg

Homemade Cheese Danishes
- Total Time: 33 minutes
Description
If you love buttery, flaky pastries with a creamy, tangy-sweet filling, these Homemade Cheese Danishes are going to be your new favorite treat. They’re perfect for breakfast, brunch, or a cozy afternoon snack. With a golden puff pastry base and a luscious cream cheese center, these danishes are both elegant and easy to make at home.
Want recipes like this delivered straight to your inbox? Subscribe now to get the latest culinary creations you’ll love.
Ingredients
For the Cheese Filling:
-
8 oz cream cheese, softened
-
¼ cup granulated sugar
-
1 tsp vanilla extract
-
1 tbsp lemon juice
-
1 tsp lemon zest
-
1 egg yolk (save the white for brushing the pastry)
For the Pastry:
-
1 sheet puff pastry, thawed
-
1 egg white (for egg wash)
-
1 tbsp water (to mix with egg white)
Optional Toppings:
-
Fresh berries (blueberries, raspberries, sliced strawberries)
-
Fruit preserves or jam
-
Powdered sugar, for dusting
-
Vanilla glaze (see notes below)
Instructions
Step 1: Prepare the Cheese Filling
-
In a medium bowl, combine softened cream cheese, sugar, vanilla extract, lemon juice, lemon zest, and egg yolk.
-
Beat with a hand mixer or whisk until smooth and creamy. Set aside.
Step 2: Preheat the Oven
3. Preheat your oven to 400°F (200°C). Line a baking sheet with parchment paper.
Step 3: Cut the Puff Pastry
4. Unroll or unfold the puff pastry sheet on a lightly floured surface.
5. Cut it into 6 equal rectangles using a sharp knife or pizza cutter.
6. Score a smaller rectangle about ½ inch inside each piece (don’t cut all the way through). This helps the edges puff up while keeping the filling centered.
Step 4: Add the Filling
7. Spoon about 1 to 1½ tablespoons of the cream cheese filling into the center of each rectangle.
8. Use the back of a spoon to gently spread the filling, staying inside the scored lines.
Step 5: Egg Wash & Bake
9. Whisk the egg white with 1 tablespoon of water to make an egg wash.
10. Brush the outer edges of each pastry with the egg wash for a golden finish.
11. Bake in the preheated oven for 15-18 minutes, or until the danishes are puffed and golden brown.
Step 6: Cool & Add Toppings
12. Remove from oven and let cool on the baking sheet for 5 minutes, then transfer to a cooling rack.
13. Top with fresh berries or a small spoonful of fruit preserves if desired.
14. Dust with powdered sugar or drizzle with glaze once fully cooled.
Notes
Use Cold Pastry – Keep your puff pastry chilled until you’re ready to use it to ensure it puffs up beautifully.
Don’t Overfill – Too much filling can overflow and make the pastry soggy.
Chill Before Baking – If your kitchen is warm, pop the assembled danishes in the fridge for 10 minutes before baking for extra flakiness.
Line the Baking Sheet – Always use parchment to prevent sticking and make cleanup easy.
Cool Before Glazing – Let them cool completely before adding glaze so it doesn’t melt off.
- Prep Time: 15 minutes
- Cook Time: 18 minutes
- Cuisine: American


