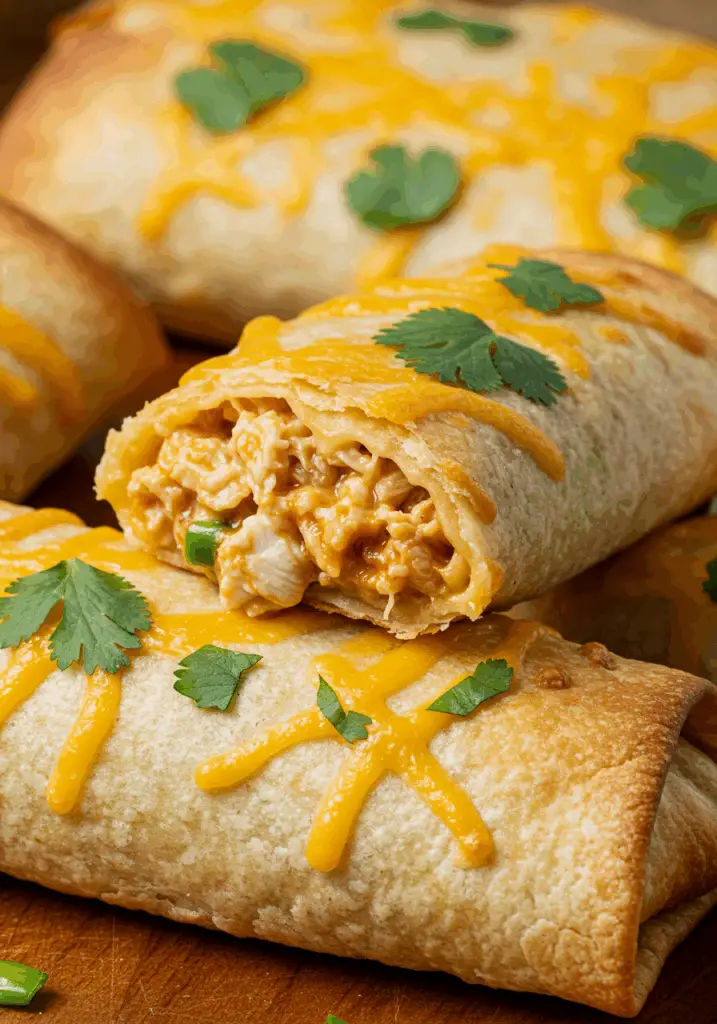
Craving something crispy, cheesy, and full of bold Mexican flavors—without the deep-frying? These Baked Chicken Chimichangas deliver all the crunch and satisfaction you love in a chimichanga, but they’re baked to golden perfection. Stuffed with juicy seasoned chicken, creamy beans, and melty cheese, this recipe is a lighter take on a classic Tex-Mex favorite.

Want recipes like this delivered straight to your inbox? Subscribe now to get the latest delicious dinners and fresh twists on comfort food favorites.
Why You’ll Love This Recipe
Healthier Alternative – Get all the flavor without the extra oil from frying.
Easy to Make – Simple ingredients and just a few steps for a satisfying meal.
Family Favorite – Crispy tortillas and cheesy filling are a hit with kids and adults alike.
Make-Ahead Friendly – Perfect for meal prep and freezing.
Customizable – Switch up the fillings with your favorite ingredients.
Ingredients You’ll Need
For the Filling:
- 2 cups cooked chicken, shredded (rotisserie or poached works well)
- 1 cup refried beans (or black beans, mashed slightly)
- 1 cup shredded cheddar cheese
- 1 cup shredded Monterey Jack cheese
- ½ cup salsa (choose your preferred spice level)
- ½ tsp ground cumin
- ½ tsp chili powder
- ½ tsp garlic powder
- Salt and pepper, to taste
For the Chimichangas:
- 6 large flour tortillas (burrito-size)
- 2 tbsp olive oil (for brushing)
- Cooking spray (optional, for extra crispiness)
Optional Toppings & Garnishes:
- Sour cream or Greek yogurt
- Shredded lettuce
- Diced tomatoes
- Sliced avocado or guacamole
- Fresh cilantro
- Lime wedges
- Hot sauce
Tools You’ll Need
- Large mixing bowl
- Baking sheet
- Silicone brush
- Aluminum foil or parchment paper
- Sharp knife
- Spatula
Step-by-Step Instructions
Step 1: Prepare the Filling
- In a large bowl, combine shredded chicken, refried beans, cheddar, Monterey Jack, salsa, cumin, chili powder, garlic powder, salt, and pepper.
- Mix well until fully combined and slightly creamy. This will help hold the filling together inside the tortillas.
Step 2: Assemble the Chimichangas
3. Preheat your oven to 400°F (200°C).
4. Warm tortillas in the microwave for 20 seconds to make them more pliable.
5. Spoon about ½ cup of the chicken mixture onto the lower third of each tortilla.
6. Fold in the sides and then roll up tightly from the bottom to form a secure burrito-like wrap.
7. Place seam-side down on a parchment-lined baking sheet.
Step 3: Bake the Chimichangas
8. Brush each chimichanga lightly with olive oil using a silicone brush.
9. For extra crispiness, lightly spray the tops with cooking spray.
10. Bake in the preheated oven for 20–25 minutes, flipping once halfway through, until golden and crispy on both sides.
Step 4: Serve and Garnish
11. Remove from the oven and let cool for a couple of minutes before serving.
12. Top with sour cream, guacamole, diced tomatoes, and fresh cilantro as desired.
13. Serve with lime wedges and your favorite hot sauce for an extra kick.
Tips for Perfect Baked Chicken Chimichangas
Don’t Overfill – Use about ½ cup of filling to avoid tearing the tortilla or messy bakes.
Seal Tightly – Rolling tightly helps prevent the filling from leaking during baking.
Flip for Even Crisp – Turning the chimichangas halfway through ensures all sides get nicely crisp.
Use Fresh Tortillas – Older tortillas may crack when folded. Warm them up for flexibility.
Make It Your Own – Swap in black beans, corn, or rice for a different twist.
Serving Suggestions
Mexican Rice – A classic and flavorful side.
Street Corn Salad – Creamy, tangy, and crunchy—perfect with chimichangas.
Tortilla Chips and Salsa – A simple but satisfying starter or side.
Fresh Fruit Salad – Adds a refreshing contrast to the spicy, cheesy filling.
Mexican Slaw – A zesty cabbage slaw adds crunch and brightness.
How to Store & Reheat
Storing:
Refrigerate: Store leftover chimichangas in an airtight container for up to 4 days.
Freeze: Wrap each chimichanga tightly in foil and freeze for up to 2 months.
Reheating:
Oven: Reheat at 375°F for 10–15 minutes, or until warmed through.
Air Fryer: Reheat at 350°F for 5–7 minutes for extra crispiness.
Microwave: Heat on medium for 1–2 minutes, but note they may lose some crisp.
Frequently Asked Questions
1. Can I use canned chicken?
Yes, though freshly cooked or rotisserie chicken provides better flavor and texture.
2. Are these spicy?
That depends on the salsa you use. Choose a mild or medium salsa for a kid-friendly version, or go hot if you like more heat.
3. Can I make them vegetarian?
Absolutely. Replace chicken with sautéed vegetables, tofu, or just use beans and cheese for a delicious veggie version.
4. What’s the best cheese for chimichangas?
A blend of cheddar and Monterey Jack melts beautifully, but feel free to experiment with pepper jack or queso Oaxaca for extra flavor.
Final Thoughts
These Baked Chicken Chimichangas are the perfect combination of crispy, cheesy, and satisfying—without the mess of frying. Ideal for weeknight dinners, casual gatherings, or make-ahead freezer meals, they’re sure to become a staple in your kitchen.
So preheat that oven, grab your tortillas, and get ready to enjoy a healthier twist on a Mexican classic that doesn’t skimp on flavor!
Preparation Time: 15 minutes
Cooking Time: 25 minutes
Cuisine: Mexican-American
Nutritional Information (Per Serving):
Calories: 410 | Protein: 24g | Carbohydrates: 32g | Fat: 22g | Fiber: 4g | Sodium: 580mg


Baked Chicken Chimichangas
- Total Time: 40 minutes
Description
Craving something crispy, cheesy, and full of bold Mexican flavors—without the deep-frying? These Baked Chicken Chimichangas deliver all the crunch and satisfaction you love in a chimichanga, but they’re baked to golden perfection. Stuffed with juicy seasoned chicken, creamy beans, and melty cheese, this recipe is a lighter take on a classic Tex-Mex favorite.
Want recipes like this delivered straight to your inbox? Subscribe now to get the latest delicious dinners and fresh twists on comfort food favorites.
Ingredients
For the Filling:
-
2 cups cooked chicken, shredded (rotisserie or poached works well)
-
1 cup refried beans (or black beans, mashed slightly)
-
1 cup shredded cheddar cheese
-
1 cup shredded Monterey Jack cheese
-
½ cup salsa (choose your preferred spice level)
-
½ tsp ground cumin
-
½ tsp chili powder
-
½ tsp garlic powder
-
Salt and pepper, to taste
For the Chimichangas:
-
6 large flour tortillas (burrito-size)
-
2 tbsp olive oil (for brushing)
-
Cooking spray (optional, for extra crispiness)
Optional Toppings & Garnishes:
-
Sour cream or Greek yogurt
-
Shredded lettuce
-
Diced tomatoes
-
Sliced avocado or guacamole
-
Fresh cilantro
-
Lime wedges
-
Hot sauce
Instructions
Step 1: Prepare the Filling
-
In a large bowl, combine shredded chicken, refried beans, cheddar, Monterey Jack, salsa, cumin, chili powder, garlic powder, salt, and pepper.
-
Mix well until fully combined and slightly creamy. This will help hold the filling together inside the tortillas.
Step 2: Assemble the Chimichangas
3. Preheat your oven to 400°F (200°C).
4. Warm tortillas in the microwave for 20 seconds to make them more pliable.
5. Spoon about ½ cup of the chicken mixture onto the lower third of each tortilla.
6. Fold in the sides and then roll up tightly from the bottom to form a secure burrito-like wrap.
7. Place seam-side down on a parchment-lined baking sheet.
Step 3: Bake the Chimichangas
8. Brush each chimichanga lightly with olive oil using a silicone brush.
9. For extra crispiness, lightly spray the tops with cooking spray.
10. Bake in the preheated oven for 20–25 minutes, flipping once halfway through, until golden and crispy on both sides.
Step 4: Serve and Garnish
11. Remove from the oven and let cool for a couple of minutes before serving.
12. Top with sour cream, guacamole, diced tomatoes, and fresh cilantro as desired.
13. Serve with lime wedges and your favorite hot sauce for an extra kick.
Notes
Don’t Overfill – Use about ½ cup of filling to avoid tearing the tortilla or messy bakes.
Seal Tightly – Rolling tightly helps prevent the filling from leaking during baking.
Flip for Even Crisp – Turning the chimichangas halfway through ensures all sides get nicely crisp.
Use Fresh Tortillas – Older tortillas may crack when folded. Warm them up for flexibility.
Make It Your Own – Swap in black beans, corn, or rice for a different twist.
- Prep Time: 15 minutes
- Cook Time: 25 minutes
- Cuisine: Mexican-American